How to configure my own name servers in cPanel/WHM
In order to set up your own name servers in Cpanel/WHM please follow this guide:-
1. For the first step in the process of configuring the name servers you have to make sure that the VPS has a proper hostname (like "server.mydomain.com", where mydomain.com is a domain you own and added in cPanel/WHM).
If you want to change your hostname you can do so by going to the following settings menu:
Hypanel -> Machine Settings -> Set machine hostname
-
2. Login to cPanel/WHM.
-
3. Search for the
Edit DSN Zonebutton and click on it. -
4. The next step is to click on the domain you want to use for nameservers to select it, and click on the
Editbutton. -
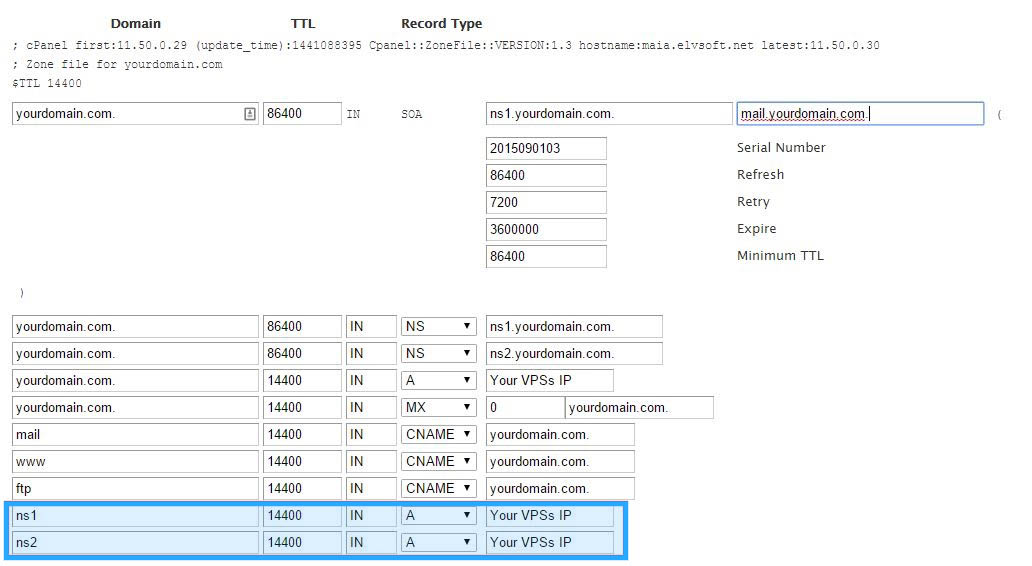
5. Start by adding ns1 and ns2 records as shown in the image bellow according to your VPS IP (you can see your VPS IPs in the Hypanel).
If you only have one IP you can use 1 IP for both records. -
6. Next step is simple, just
Savethe DNS zone. -
7. You will need to also add the nameservers
ns1.mydomain.comandns2.mydomain.comto your domain register.
Next you will need go to the company you bought the domain from and setup ns1.mydomain.com and ns2.mydomain.com with the IPs you set at step 5. -
8. For the final step you will need to check if your domain has the proper nameservers at .... (where mydomain.com is the name of your domain).