How to Stream with Auto D,In order to use AutoDJ.
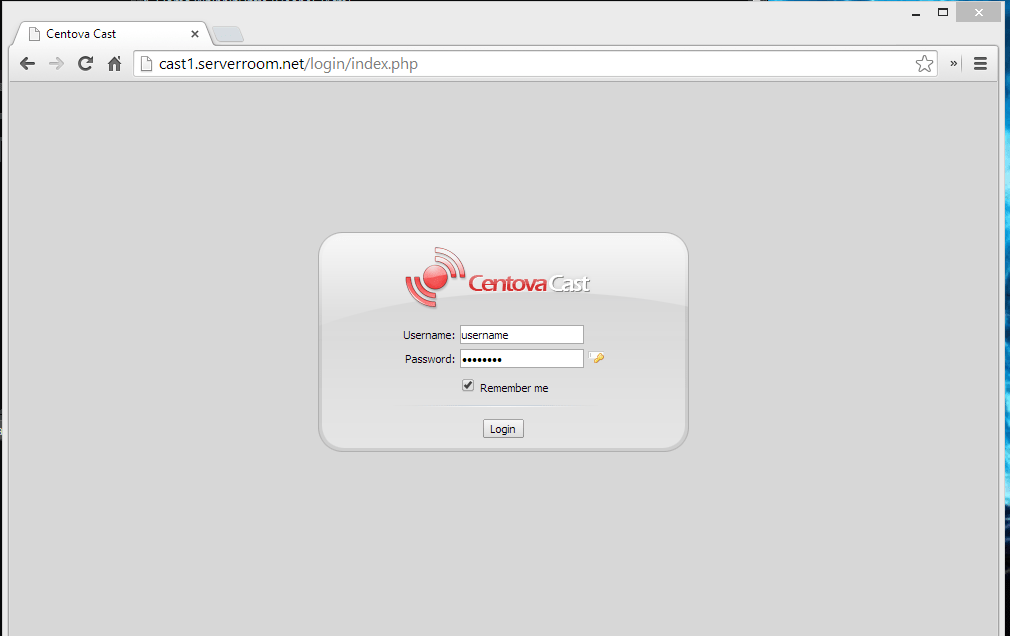
In order to use AutoDJ, open up a new windows in your browser, and go to your AutoDJ Web Interface at http://cast1.serverroom.net, enter the username and password from your Account Dashboard to login.
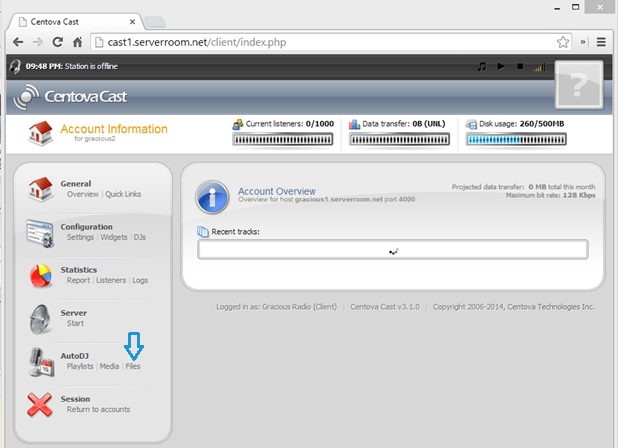
After you have logged in you will firstly have to upload your files, to do so you must click on "Files" from the left side column of the AutoDJ interface.
*Please note that the Auto DJ is designed to work only with .mp3 files.
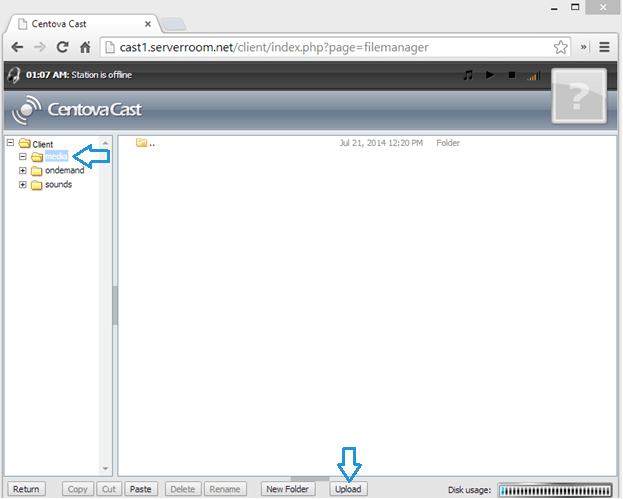
Once you are in the "Files" sections you will have to click on the "media" folder and then click on "Upload" from the bottom of the page.
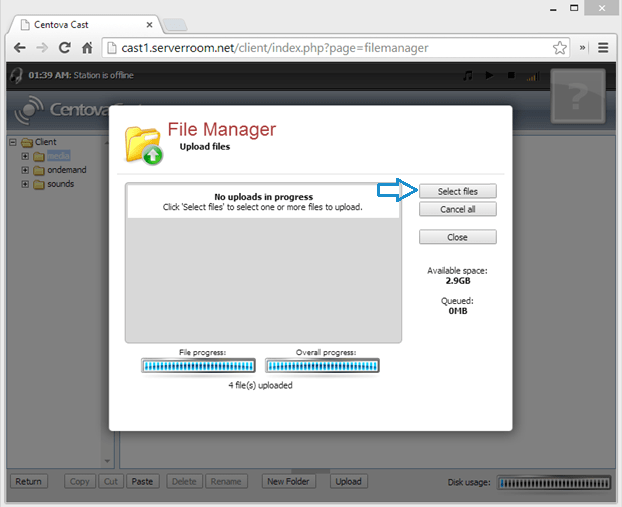
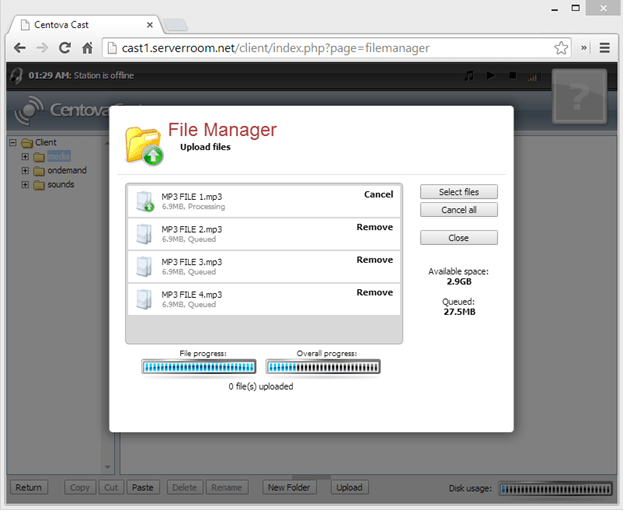
Once the "File Manager" has been opened, you will be able to upload your music files to your AutoDJ.
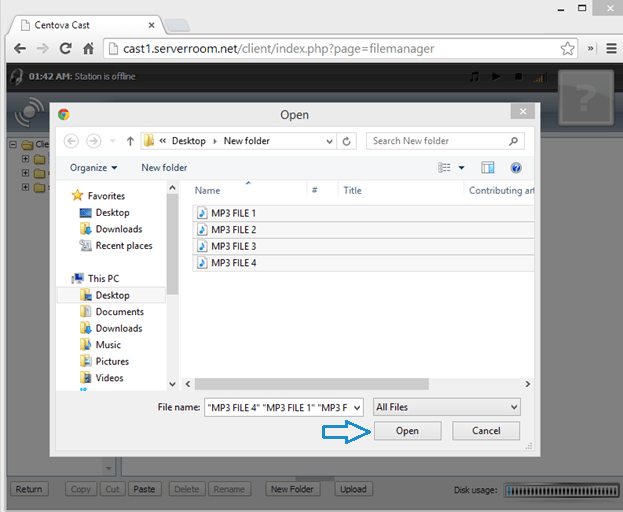
Click on "Select files" and navigate to your songs folder,
Select the files that you want to upload and click "Open"
Once your uploading process has finalized you have to click on "Close" and go to the "files" section.
After you have arrived back in the “Files” section you have to click on "Return" to go to "Account Overview".
Now that you back in the account overview, click on the "Media" button from the left side column.
In the "Media" you will have to firstly update your Media Library by clicking "Options" and then "Manual Library Update".
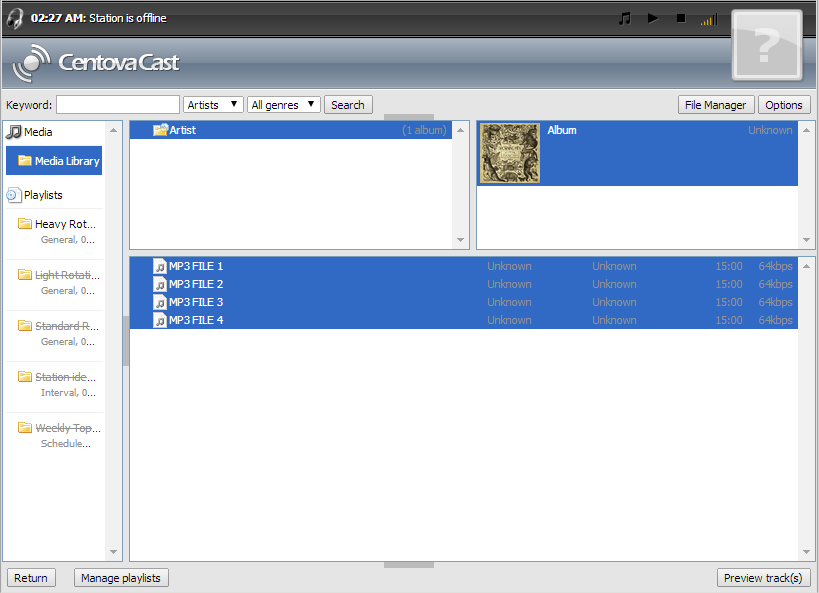
After the Media Library has updated you shall be able to see the content that you have uploaded, and you will be able to put your content into your playlists.
To do so you will have to click the "Artist", then the "Album" and then you will be able to see the files in the windows below.
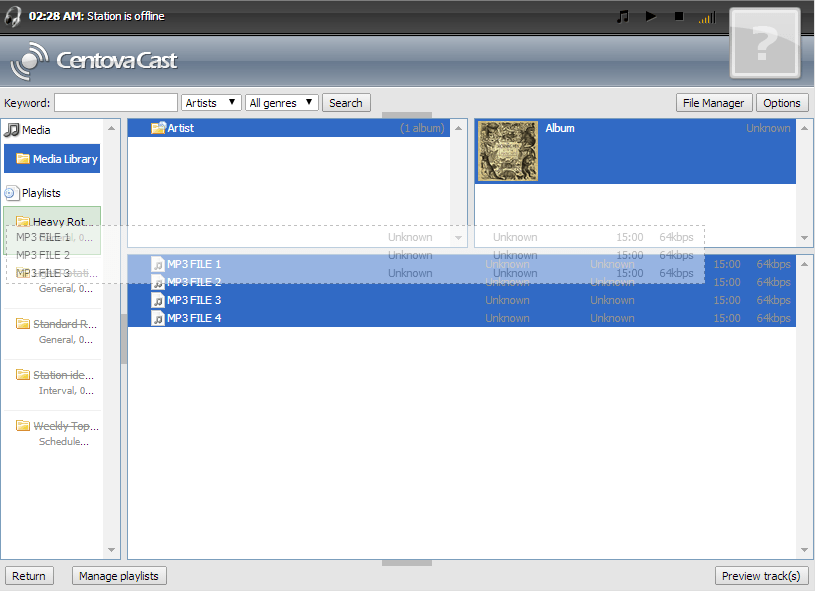
You can select multiple files to put in your playlist by clicking one file, pressing "Shift" on your keyboard, and click one the last file in your selection.
Once you have selected your files, you simply drag and drop them into your playlist.
*Please note that if you leave any empty playlists active, the AutoDJ will not function properly.
To disable a playlist from the Media Library, simply right click on it, and click on "Disable".
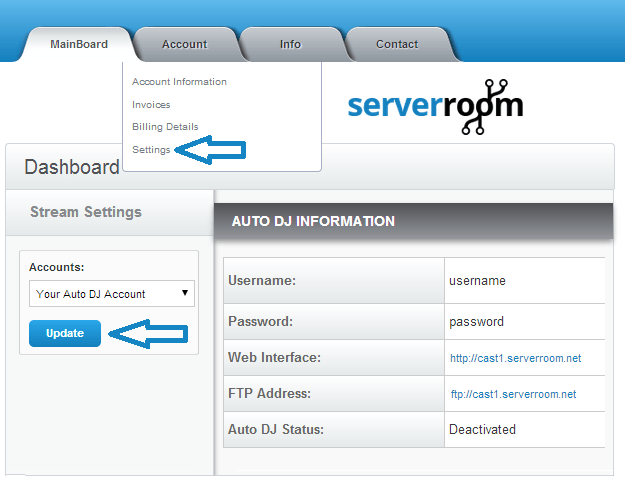
Now that you have finished adding files to your playlists, it is time to tether your Auto-DJ account to your desired SHOUTcast server, from your Server Room Dashboard. Select your AutoDj account, click on update, hover the cursor over the account tab, and from the drop-down menu, click on "Settings".
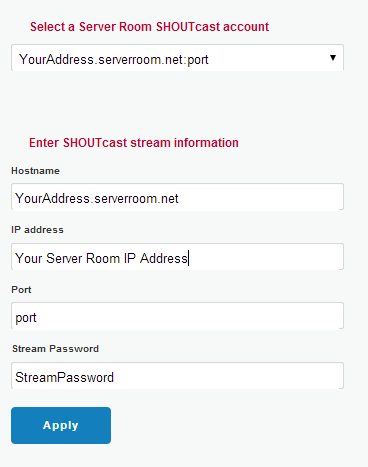
From the "Settings" menu you will be able to select your ServerRoom SHOUTcast account to tether the AutoDJ to, if you have an autoside SHOUTcast server, you will have to enter the server details manually, and then click the "Apply" button.
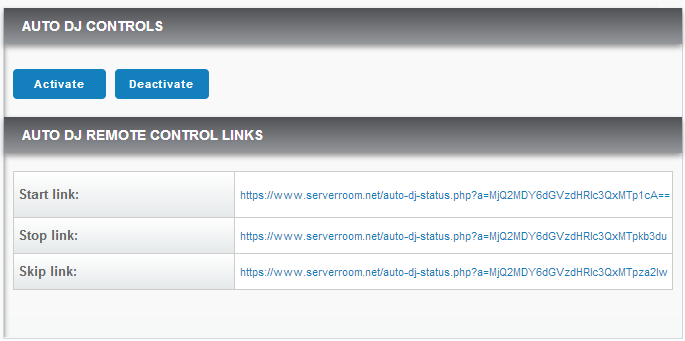
And now onto your final step towards begging your autoDJ stream, after you have updated your AutoDJ with the SHOUTcast server information, click on "Mainboard" and start your AutoDJ from the "AutoDj controls".
Did you know we sell streaming services?
Our audio and video streaming services come with unlimited connections, unlimited bandwidth, and are backed by our 24/7 expert support staff!