Follow this step-by-step guide to set up your own custom name servers in cPanel/WHM. Point your domain to ns1 and ns2 records you control and take full ownership of your DNS.
Follow each step carefully to configure your own custom name servers in cPanel/WHM.
Your VPS must have a proper hostname such as server.mydomain.com, where mydomain.com is a domain you own and have added in cPanel/WHM. To change the hostname, go to:
Hypanel → Machine Settings → Set machine hostnameLog in to your WHM control panel using your root credentials.
In WHM, search for Edit DNS Zone and click on it.
Click on the domain you want to use for your name servers to select it, then click Edit.
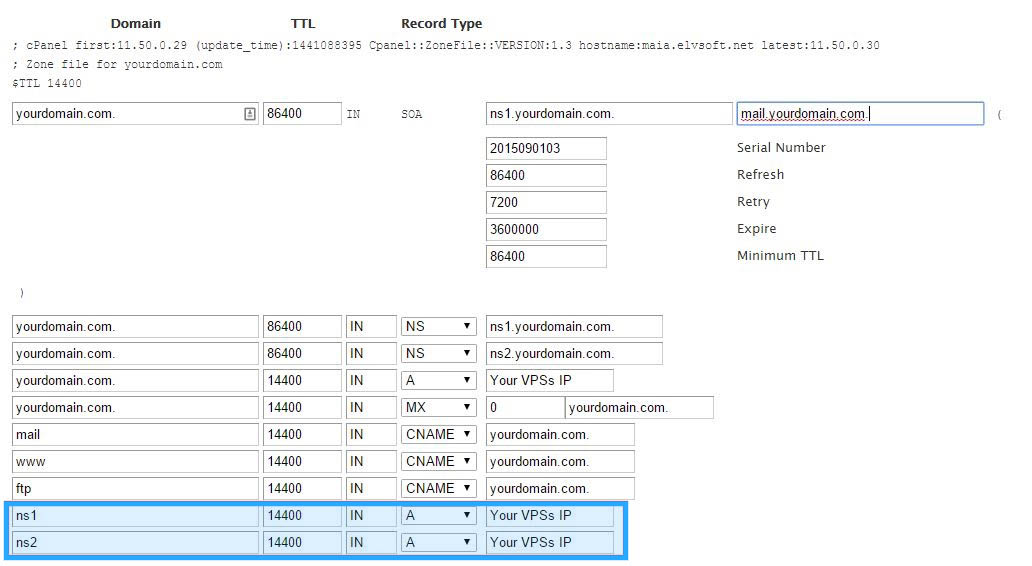
Add two A records pointing to your VPS IP address:
ns1.mydomain.com → your VPS IPns2.mydomain.com → your VPS IP (if you only have one IP, both records can use the same IP)Your VPS IP addresses are visible in the Hypanel.
 Expand
Click Save to apply your DNS zone changes.
Log in to the company where you registered mydomain.com and create glue records (also called host records or child name servers):
ns1.mydomain.com → your VPS IP (from step 5)ns2.mydomain.com → your VPS IP (from step 5)This tells the internet where to find your name servers.
After saving, check that your domain has the correct name servers by using a DNS lookup tool and querying mydomain.com for its NS records. DNS propagation can take up to 24–48 hours to complete globally.
Common questions about setting up custom name servers in cPanel/WHM.